I once modeled an even older version of the iPod using Rhino, and here’s the result. It is an excellent NURBS modeling product; I am very pleased with the way Rhino handles Boolean operations - it is very stable.

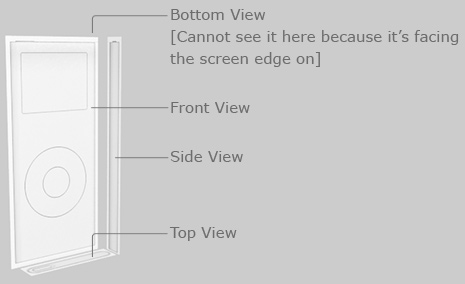
The reason for this is to make tracing convenient; depending on how you model it may or may not apply.
In the steps to come, I will no longer show the schematic planes; it is understandable that you will need them to guide your modeling.
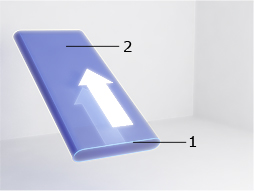
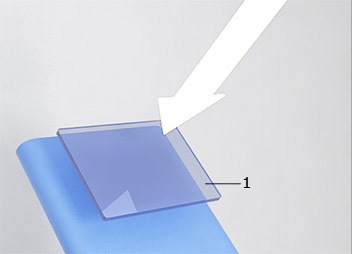
- Using Spline/Curve, draw out the very outer edge of the iPod from the top or bottom view; it doesn't matter.
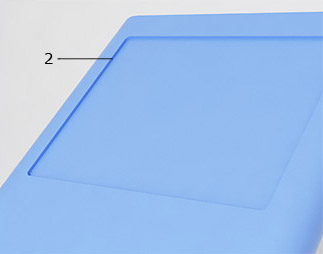
- Extrude from the spline, the main body of the iPod.
Naturally, you’ll use the schematic planes for guidance regarding its height.
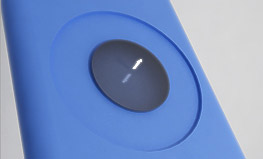
Create the screen’s spline by tracing out its shape.
Extrude and use that as a boolean subtraction object.
You can either guess the depth of the screen using common sense, or you could look at an actual iPod nano.
If you are using NURBS, especially with Rhino, your job is done.
The way NURBS handles Boolean operations can only be described as perfection ;p
If like me, you are using polygons and you encountered some problems, please kindly refer to this tutorial that I have created on fixing booleans :)
 Do the same thing for the “hole” of the wheel.
Spline→Extrude→Boolean with the main body.
 Fix the boolean operation [if you are using polygon modeling like what I’m doing for this particular model].
If you are using 3DS Max, you’ll select the inside polygons of the hole [wheel] and click “insert” to create another polygon [actually it’s more like slicing] to match the size of the inner wheel.
If you’re using NURBS, ignore this step.
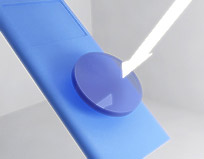
 Polygon Modeling: Extrude from the hole to create the inner button.
NURBS Modeling: Model a cylinder and Boolean union it in.
The reason why NURBS can do this while polygon cannot [not really cannot, more like advised not to] was because you have already gone all the way to fix the Boolean operation that resulted from the subtraction from the wheel, hence, why not use the fixed result to extrude another button instead of fixing another Boolean operation right?
That’s why the second step was created for polygon modelers like myself :)

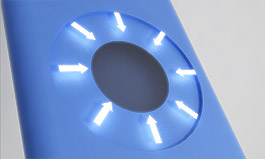
To create the wheel, select the inner area, insert, and extrude.
NURBS users, you can use another Boolean union operation if you want to or you can also just extrude, choose.
P.S: Please note that for this particular view, I have exaggerated the gap between the wheel and its surrounding area for easy visibility, the actual gap was significantly smaller.
Please take note of this when you are modeling.
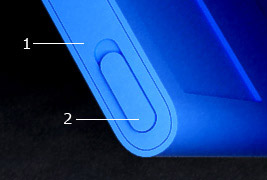 To achieve Number 1, take the top polygons, insert polygons [in another word, you slice a smaller piece inside], intrude in, then extrude out.
For NURBS users, you can use boolean operation to boolean out a hole then place a slightly smaller version of the body frame inside.
For both methods, makes sure the gap isn’t too wide.
Repeat the same thing for number 2.
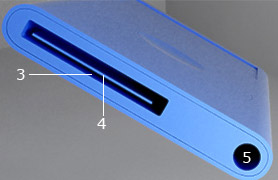 Number 3 & 5 are simply single Boolean operations.
Number 4 was just a simple piece of rectangular geometry placed inside.
Now unwrap the UVs of your model so that you can texture them properly.
Due to the fact that this tutorial was software & technique [polygon/NURBS] agnostic, I will not dwell into texture mapping.
Suffices to say, once you’ve textured it, you’ll have immortalized your very own iPod.